Search This Blog

Showing posts with label Tutorial. Show all posts

Thursday, December 8, 2016

DIY Clothespin People Family Christmas Ornament Tutorial

I have this tradition, where every year, I make a Family Christmas ornament.  One year I made felt cupcakes, then clay Hungary-shaped ornaments, and last year I made wood ring ornaments with our picture modge-podged onto it.
This year, I was wishing we could all be together, and was trying to think of a way to recreate that somehow.  So, I decided to make miniatures of each of us.  I bummed around online to try to find something, but came up kind of short.  I could find pictures, but no real tutorials.  So I hope you come across this, and it is EXACTLY what you were looking for! :)

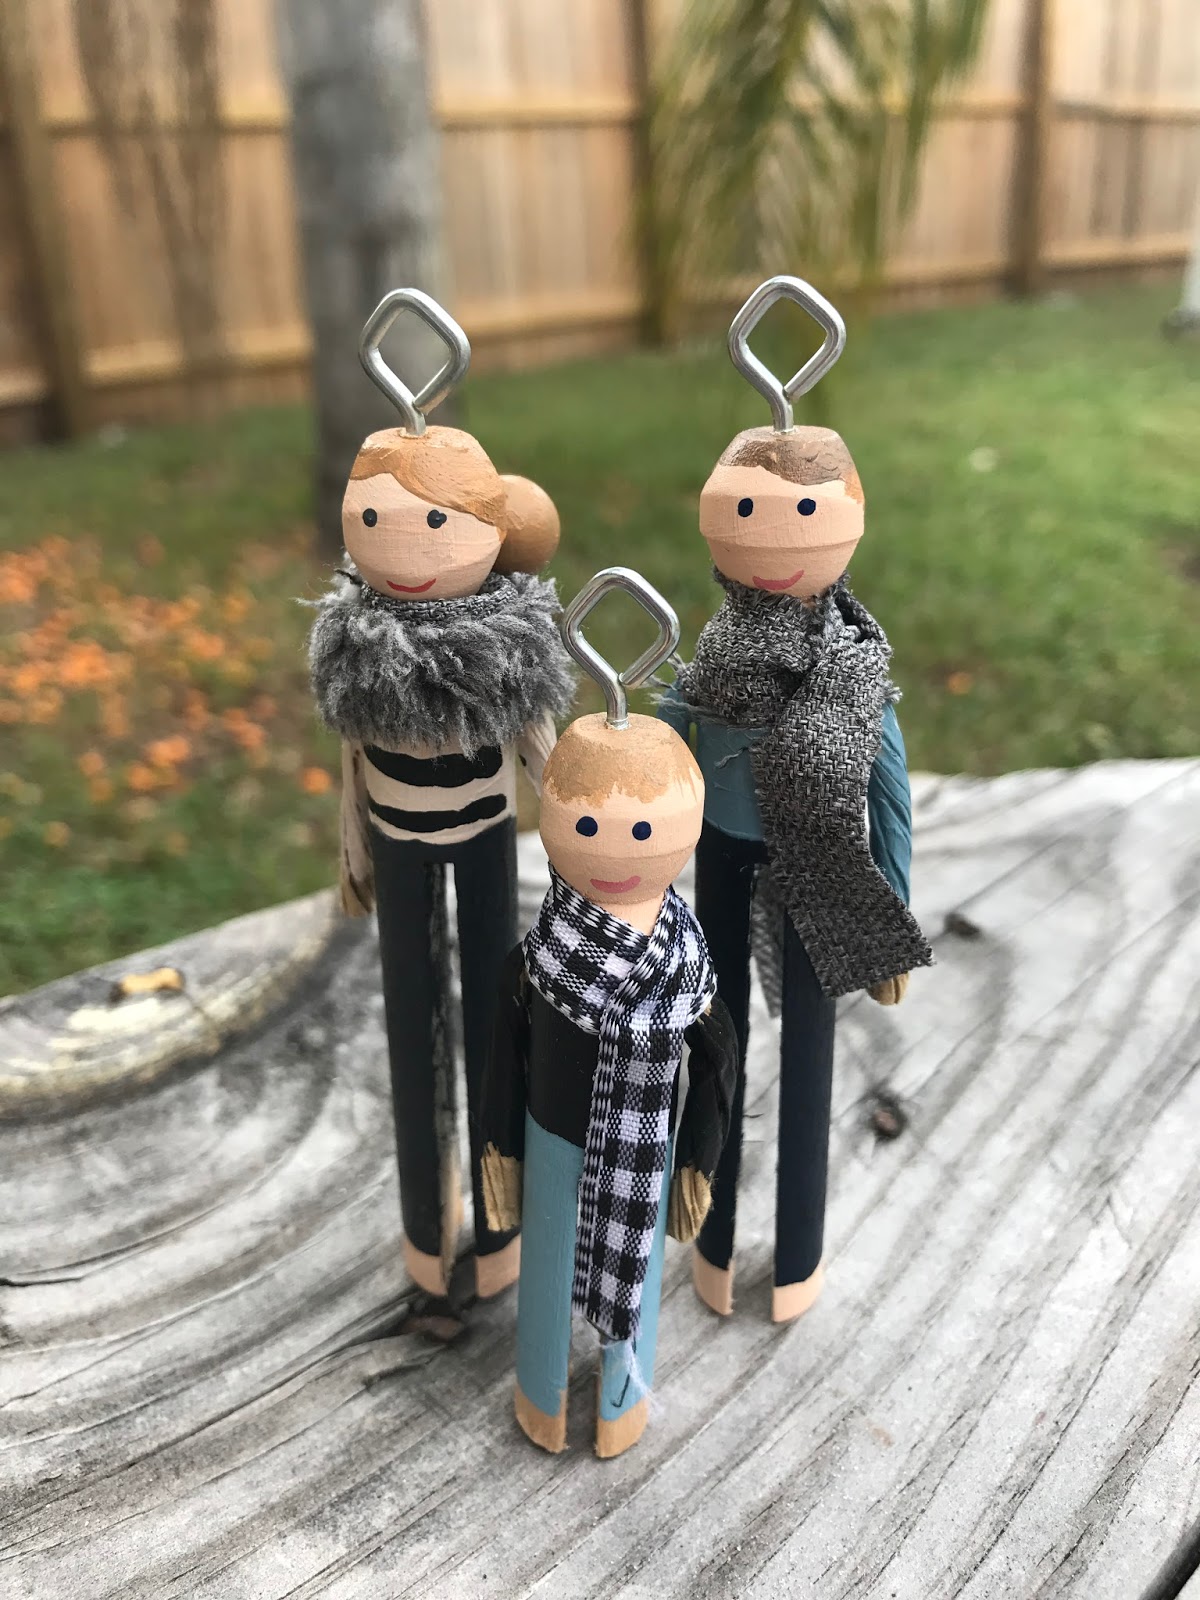
Here is the finished project:


Here's what you'll need:
- Wooden clothespins (you can find them at craft stores)
- Small screw-in hooks
- Wire that's been wrapped in butcher paper (again, craft stores)
- Acrylic paint
- Fabric swatches
- Pencil
- Super glue
- Drill
- Paint brush
- Pearl-headed pin

1. First thing I did, was paint the pin heads and feet with a skin tone.  (I made a few extra, and ended up being very glad I did, as I messed up a couple, and one split down the middle when I screwed in the hook.)


2. Next, I painted the hair.  (For the girls, I glued a bead to the back, and painted that too, to make buns.)


3. In hind-sight, this is when I would've screwed in the hook.  I did it at the end, which meant that when the head of one split, I had to scratch the whole thing.

4. Next I started working on the facial features.  For this, I used the pearl-headed pin, and a very thin paintbrush.  (For the glasses, I used a pencil, because I didn't want them to be a very "heavy" feature.)


5. Next I picked out fabric.  I knew I wanted cool colors, blues and grays.  So, I went to a craft/fabric store.  Initially I was looking for those groups of quilting squares you can buy, where all the squares go together, but couldn't find any.  Finally, I found where they have the left-over pieces, and found fun things in there.  I also got a yard each of some fun knitted ribbon/edging stuff.  (I don't know any of the technical terms, I am so not a seamstress.)  This is what I decided to go with:


(I got the red for my aunt and uncle's set, which had a different color-scheme.)

6. Next, I decided who got which material for a scarf.


7. In the meantime, I had Dan drill a hole for their arms, right where the ridge is.  I thought it made for a natural looking shoulder.


8. After that, I threaded the butcher paper wrapped wire through, and cut it to the desired length.


9.  Now for the clothes.  I went with pretty much solids, and stayed in that blue-gray color family.  (Again, this is the set I made for my uncle, hence the reds.)


10.  Then, I created the miniature scarves, and super glued them in place.

After all that, I took a "family picture" of all of us together, which was the idea behind it in the first place. :)


Here are the corresponding ornaments side by side.

Mom and Dad


Our family


Jonathan and Katie


Stephen


Our friend who we live with, Amy


My Aunt and Uncle, who host us for Thanksgiving every year


So, I gave everyone "themselves" for Christmas.

For wrapping, I found these beautiful, simple boxes at Michael's, too!  (And used red ribbon, and tags made out of old scrapbooking paper.)


And there you have it!  Please let me know if you've ever made anything similar, I'd love to hear your tips!

Do you have any similar family traditions or ornament exchanges?

Merry Christmas, and happy New Year!

Friday, July 3, 2015

Disney Villain Costume DIY Tutorial - Yzma and Kronk

Every summer our youth group has what we call "Riptide Summer Camp".  Every week has a theme, for which the students are encouraged to dress up.  This year we're finishing the summer off with a super-fun Color War!
What this means for me though, is the opportunity for SO MANY COSTUMES!!!

The first night's theme was Disney villain.  Our best friends here in Jacksonville are also some of our youth sponsors.  We brain-stormed a little, and then came up with the PERFECT costume idea for them... Yzma and Kronk, from The Emperor's New Groove (Which is one of my favorites, and I could quote the whole thing to you!).


Incase you're unfamiliar with the movie, here's who they are:


So, my friend Amy and I went to Michael's and Hobby Lobby, and got all the supplies we would need.

Kronk's Costume:

1 plain blue T-Shirt
3 sheets of large yellow foam paper
1 yellow foam construction hat
Yellow pipe cleaners
1 roll of light purple duct tape
Yellow cord
2 yards of dark purple fabric

Yzma's Costume:

Strappy little black dress
Purple boa(s)
Purple feathery hair pieces/decorations
Wide, wired purple ribbon
Teal foam paper
Earrings (ones you preferably don't care about)
Black stretchy hair band
Lots of purple make up (falsies optional)

First, we started on Kronk's costume.
1. Take the blue shirt, and cut off the sleeves.
2. Take one of the large yellow foam papers, in the top middle, cut a semi circle for the neck.  Cut two rectangles out of the two bottom corners.
3. I laid a wrap-around skirt I had on the purple fabric, and cut along that.  Basically, you're cutting the fabric into a semi-circle, but don't forget to leave a thin piece at the top to tie it with.
4. Cut one piece of the yellow foam paper in half, creating two smaller rectangles.  Cut the bottom of each one into a curve.  Using a hole punch, punch holes along the edges, every two inches.  Lace the yellow rope through, like shoe laces.  These are the leg cuffs.
5. Repeat with slightly smaller rectangles for arm cuffs.

6. Cut the rim off the yellow foam hat.  Push a pipe cleaner through the top.  Using duct tape, secure it on the inside.  Using left-over yellow foam paper, cut out two small semi-circle-type shapes for the top of his hat.  Using hot glue, glue them to the top of the pipe cleaner (one on either side).
 7. Make a belt out of the light purple duct tape, by adhering strips of it to itself.

8. Assemble! (Pair with sandals or flip flops.)


Yzma's Costume
1. Find a scrappy black dress.
2. Cut two large ovals out of he teal foam paper.  Glue them to earrings (that you don't particularly care about).

3. Purple boas.  We used two, to add a new dimension.
4. Pull hair into high pony tail.
5. Put on black hair band.
6. Cut long piece of ribbon (12 inches).  Curl around your hand.  Take off hand, and uncurl gently, and adjust to your liking.  Tuck bottom of curl into the hair band, near the nape of your neck.  Use bobby pins to secure at the top of your head.  Add feathery hair piece.
7. Assemble! (Pair with black shoes.)

The moment you've all been waiting for...
Don't they look just perfect!!!

I love her!

Guess who that is next to her... Tutorial coming soon!