Search This Blog

Showing posts with label kitchenmaid recipe. Show all posts

Monday, November 30, 2020

Festive Cranberry Orange Loaf

I've made this cranberry orange loaf for all the fall/winter holidays for the past couple years, and realized that I've never actually posted it on here.

So today, without further ado, I will be sharing this delicious tart and sweet treat with you.


Ingredients:

2 cups all purpose flour
1 tsp baking powder
1/2 tsp salt
1 cup sugar
1 tbsp orange zest (about an orange and a half)
1/2 cup buttermilk
1/2 cup sunflower oil
1/2 cup orange juice
2 eggs
1 tsp vanilla
1 - 1 1/2 cups cranberries (fresh or frozen are both perfectly fine)

Glaze:
1 cup powdered sugar
2 tbsp orange juice

Directions:

1. Preheat oven to 350 F/175 C and grease a 9x5 inch (23x13 cm) loaf pan.

2. In a medium bowl combine the flour, baking powder and salt. Set aside.

3. In a small/medium bowl combine the sugar and orange zest using a fork. It'll turn your sugar a light yellow color. Set aside.

4. Attach a large mixing bowl to your stand mixer as well as the paddle attachment. Pour into the bowl the buttermilk, oil, orange juice, eggs and vanilla. Mix on a low speed until fully combined.

5. Keep the mixer going. Alternate adding the flour mixture and the sugar/zest mixture. Continue mixing until you get a nice smooth consistency.

6. Finally add in the cranberries, mix until just combined.

7. Pour batter into your prepped loaf pan. Bake for 70-75 minutes, or until a toothpick inserted comes out clean. You should check on it after about 55-60 minutes of baking, and tent a piece of aluminum foil over the top of it to protect the top from getting too brown.

8. Remove from oven, and allow to fully chill. 

9. Before serving, using a whisk, combine powdered sugar and orange juice, and pour over the loaf. It's as beautiful as it is festive!


+ If you'd like, this is a great dessert to make ahead and freeze. Do this before you glaze it. To freeze, wrap the loaf in plastic wrap, and then again in aluminum foil. It can stay in the freezer for at least a week, probably 2. (I haven't tried it that long, but cake freezes very well.) If you decide to freeze your loaf, remove it from the freezer a few hours before you intend to serve it. Once you're ready to serve it, make the glaze and pour it on top.

Tuesday, July 28, 2020

Cinnamon Twist Sourdough Sandwich bread

I have, as much of the world during this COVID-19 quarantine/shelter-in-place, jumped on the sourdough bandwagon. I'd say I'm sorry, but I am SO not. (And neither is my family.)

I am nowhere near mastering this yet, but I did come up with something on my own yesterday, so I am going to share it with you.

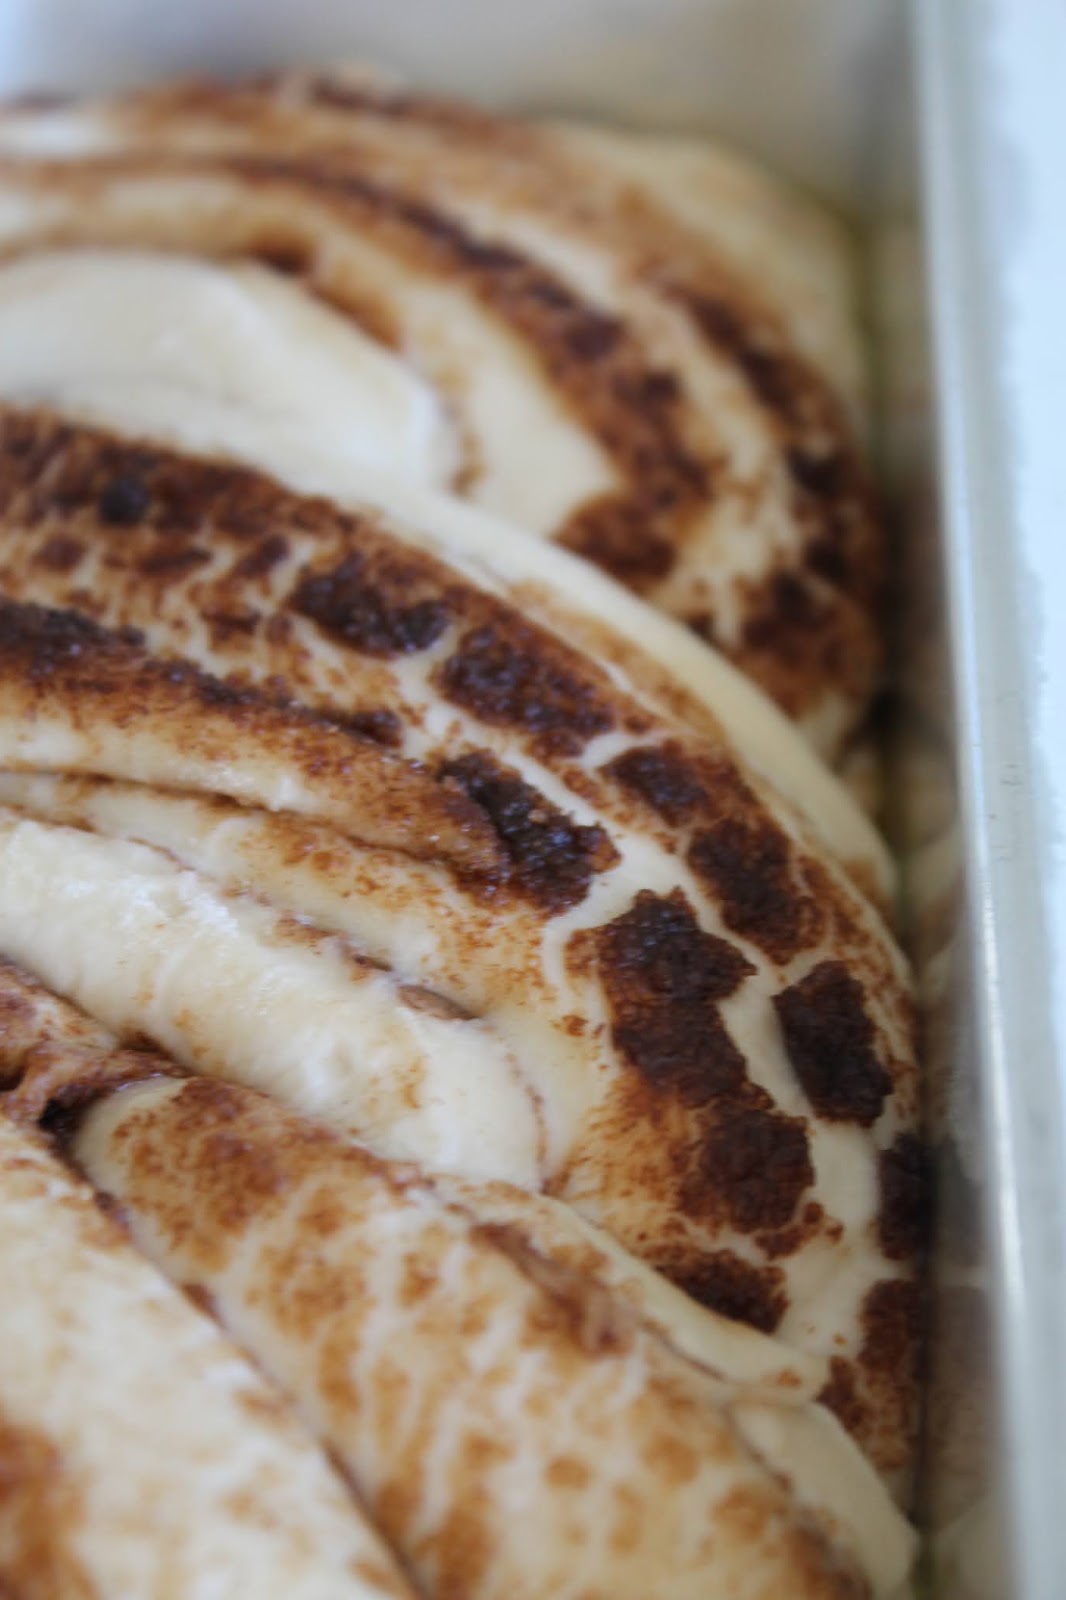
I have been using Melissa K Norris' sourdough sandwich bread, and we love it! (She has a great video for all of us visual learners!) I was in the mood for something a little sweet, maybe a little derivative of Pepperidge Farm's Cinnamon bread, with a little "babka" thrown in, and came up with this.

Not bad, huh?

You'll need:
- standing mixer with dough hook
- standard loaf pan
- rolling pin

Ingredients:
175 grams water (I've been using lukewarm water)
200 grams active sourdough starter
1 tbsp melted butter
1 1/2 tsp sugar
1 1/2 tsp salt
400 grams all purpose flour

+ olive oil for greasing
++ butter for very end

Cinnamon swirl:
1-2 tbsp melted butter (yep, more butter)
approx. 1/4 cup cinnamon sugar mixture (about 1:1 ratio)

Directions:
1. In a large mixing bowl combine water, starter and melted butter until fully combined.

2. Add sugar, salt and flour. Combine (by hand) until fully incorporated. Attach to your standing mixer, along with your dough hook, and knead on medium-low for 8-10 minutes. (I have found 9 minutes to be the sweet spot.) The dough should not stick to the bowl or your hands (much).

3. During this time, grease your loaf pan generously with olive oil.

4. Using a rolling pin, roll out into a rectangle on a lightly floured surface. Make sure the shorter end of the rectangle is about the size of the pan.

5. Brush the 1-2 tbsp melted butter onto the rectangle, then evenly spread the cinnamon sugar on top. (I didn't want it to be super sweet, but you could definitely add more cinnamon sugar if you want.)


6. Roll up the dough, just like you would with cinnamon rolls.

7. Using a knife, cut your loaf log in half (longwise), leaving about 1/2 inch connected at the top. 


8. Carefully twist the two sides to create "braid", tucking in the ends. Lift, and place in loaf pan.


9. Cover with a damp dish cloth, and set somewhere warm. (I use my laundry room.)

10. Allow to rise for about 5-6 hours.


11. Bake at 400 F/200 C for 30 minutes.

12. When you take it out of the oven, immediately brush some more butter on top. Allow to cool enough to remove from pan, then rub down the sides with a little extra butter, too. (What can I say!? Butter is awesome!)

13. Make sure you allow your bread to cool at least 30 minutes before you try to cut it. But once you do, and you see those (basically) magical cinnamon swirls... it's heaven!

This bread is perfect for breakfast toast, a not-so-sweet treat, or as French toast bread. Yummmm!


I'm so happy with how it turned out!
If you decide to give this baby a try, please let me know! I would love to know how it goes.

Monday, May 11, 2020

Streusel-Topped Peach Muffins

Aren't peaches the bomb?!
They just scream summer! I had a bunch of them sitting in my window, and was dying for a reason to bake with them.


There is a tailor on my new street. I took a duvet cover over to him the other day to have him let out and change the seam (hubby didn't believe me when I told him which size to buy - it was too small). When I asked him how much it would cost, he told me "Oh, nothing. I am just doing this because you are a good neighbor." (Mind you, this is the first time we've met.) I found this beyond charming, but also knew I couldn't leave it at that, so I wanted to bake something for when I went to pick it up.


Enter streusel-topped peach muffins.

Ingredients:

Streusel topping:
1/2 cup (94 grams) all purpose flour
1/2 cup (100 grams) brown sugar
1/4 tsp salt
1/4 tsp ground cinnamon
1/4 cup (55 grams) chilled butter cut into small pieces

Muffin batter:
1/3 cup plus 1 tbsp (90 grams) room temperature butter
3 peaches - peeled and chopped into small pieces (pinky fingernail-sized)
1 1/2 cups (190 grams) all purpose flour 
1 tsp baking powder
1/2 tsp baking soda
1/4 tsp salt
2/3 cup (130 grams) sugar
1 large egg beaten
1 tsp vanilla extract
1/2 cup (120 ml) buttermilk (I have also made this with natural drinkable yogurt we can find here in Slovenia. It makes for a slightly denser muffin, but works just fine in a pinch.)


Directions:

1. Heat your oven to 350 F / 175 C.

2. Place muffin liners in your muffin tin (I made these out of baking paper), or spray your muffin tin with non-stick spray.

3. Using the whisk attachment on your mixer (or by using a pastry cutter) incorporate all of the ingredients for your streusel until crumbly (some large buttery chunks are good). Place in fridge until ready to use.

4. In a bowl, whisk (by hand is fine - less dishes) together flour, baking soda, baking powder and salt. Set aside.

5. Using the paddle attachment on your mixer, cream together the butter and sugar. Beat for about 1 minute.

6. With the mixer still going, add egg and vanilla extract. Beat for another minute.

7. With the mixer still going on a low speed, add half of the flour mixture. Fully incorporate, then add buttermilk. Fully incorporate that, then add second half of buttermilk. Mix until just combined.

8. Remove bowl from mixer, and gently fold in 2/3 of the peach chunks.

9. Spoon about 1 tbsp of batter in each muffin liner. Spoon the leftover peach chunks on top of that evenly between all twelve slots. Cover that with a generous tbsp of streusel topping. Then, fill them up with the remaining batter, and top with remaining streusel topping.

10. Bake for 25-30 minutes, until golden brown on top and a toothpick inserted comes out clean.

11. Allow to cool in pan for a few minutes.


I say enjoy them warm, but they also keep for a couple days in an airtight container.

According to my daughter, it is eat-it-off-your-shirt good! I think if you try these, you'll agree! 


Sunday, April 19, 2020

Grilled Apple Fritter Bread


Hey there! Happy “Another Day in Quarantine”! Our oven is still out of commission, so I have been doing all of my quarantine baking on our grill. Today’s attempt was apple fritter bread, and honestly, it was a huge hit! 

I loved that I had all the ingredients already on hand – and you probably do, too! It bakes in a loaf pan, which is easier for grilling, as all of it stays on indirect heat.

So, without further gilding the lily and with no more ado, I give to you – grilled apple fritter bread.


Ingredients:

Batter:
2/3 cup white sugar
½ cup room temperature butter
2 eggs (beaten)
1 ½ tsp vanilla extract
1 ½ cup all purpose flour
1 ¾ tsp baking powder
½ cup milk 

Apple Filling:
2 apples – peeled and chopped into small chunks
2 tbs white sugar
1 tsp cinnamon

Cinnamon Sugar Filling:
1/3 cup light brown sugar
1 tsp ground cinnamon

Crème glaze:
2/3 cup powdered sugar
2 tbs milk


Directions:

1.    Preheat grill to 350 F / 175 C. You will be baking this on indirect heat.
2.    Combine chopped apples, sugar and cinnamon in a small bowl. Set aside.
3.    Combine ingredients for cinnamon sugar filling. Set aside.
4.    Using your mixer with the paddle attachment, cream together white sugar and butter.
5.    Add eggs, one at a time. Mix until well combined. Add vanilla extract.
6.    In a separate bowl, whisk together flour and baking powder. Add to mixture in about 3-4 portions, waiting for it to become well-combined each time before adding the next portion.
7.    Add in milk, and fully incorporate.
8.    Grease and flour a loaf pan (usually 9x5 inch).
9.    Pour half the batter into the pan. Top with half the apple mixture, and half the cinnamon-sugar mixture. Pour the second half of the batter in the pan, top with remaining apples and cinnamon-sugar. Take a toothpick, and swirl the batter around a bit.
10. Bake for 55-60 minutes, or until a toothpick inserted comes out clean. While the bread is baking, make crème glaze.
11. Once the bread is baked, wait 10-15 minutes and drizzle the glaze on top.
12. Slice and serve warm.


Yummmmmmm…

This is the perfect rainy day pick-me-up. It tastes like a country grandma is giving you a hug.

I originally found this recipe on diyways.com, but their ingredients list wasn’t complete where it was written out, only in their video.

Please let me know if you give this recipe a try! I would love to see how it turns out! (Of course, you can bake this in a conventional oven just as easily - if not more. But this is a great dessert for on the grill!)


Happy baking!

Thursday, December 5, 2019

Perfect Pecan Pie

Perfect pecan pie - now there's a tasty alliteration!


My mom is known throughout the maritimes for her pecan pie. I, therefore have never attempted it, haha! It is however Dan's favorite pie, so this Thanksgiving I endeavored to make one.

I don't really know why pie crust has always seemed so scary to me, but it has. Thankfully everything went divine, and the pie was a huge success!


And now, without further ado, here is your "Perfect Pecan Pie" recipe.


Pie crust 

Ingredients:
(makes one 9-inch pie)
1 1/3 cup all purpose flour
1/4 tsp salt
6 tbs/85 grams butter
2 tbs vegetable shortening (here in Europe I substitute with Rama)
2-3 tbs (ice) cold water

Directions:
1. Using the whisk attachment on your standing mixer combine flour and salt.

2. Next, cut in your butter and shortening. (If you do not have a mixer, alternatively you can use a pastry cutter or two knives.) Let mixer run until the mixture resembles a coarse crumble. (Looks kind of like cornmeal.)

3. Take bowl off of mixer. Sprinkle the cold water over the flour mixture, 1 tbs at a time. Mix lightly by hand until the pastry holds together when lightly pressed. 

4. Shape the pastry into a ball. Flatten to a 1-inch thick disc. Wrap and refrigerate for at least 30 minutes. (You can also do it overnight, which is what I did. If you chill it overnight, make sure you take your dough out about 30-45 minutes before you intend to use it so that it is pliable.) 

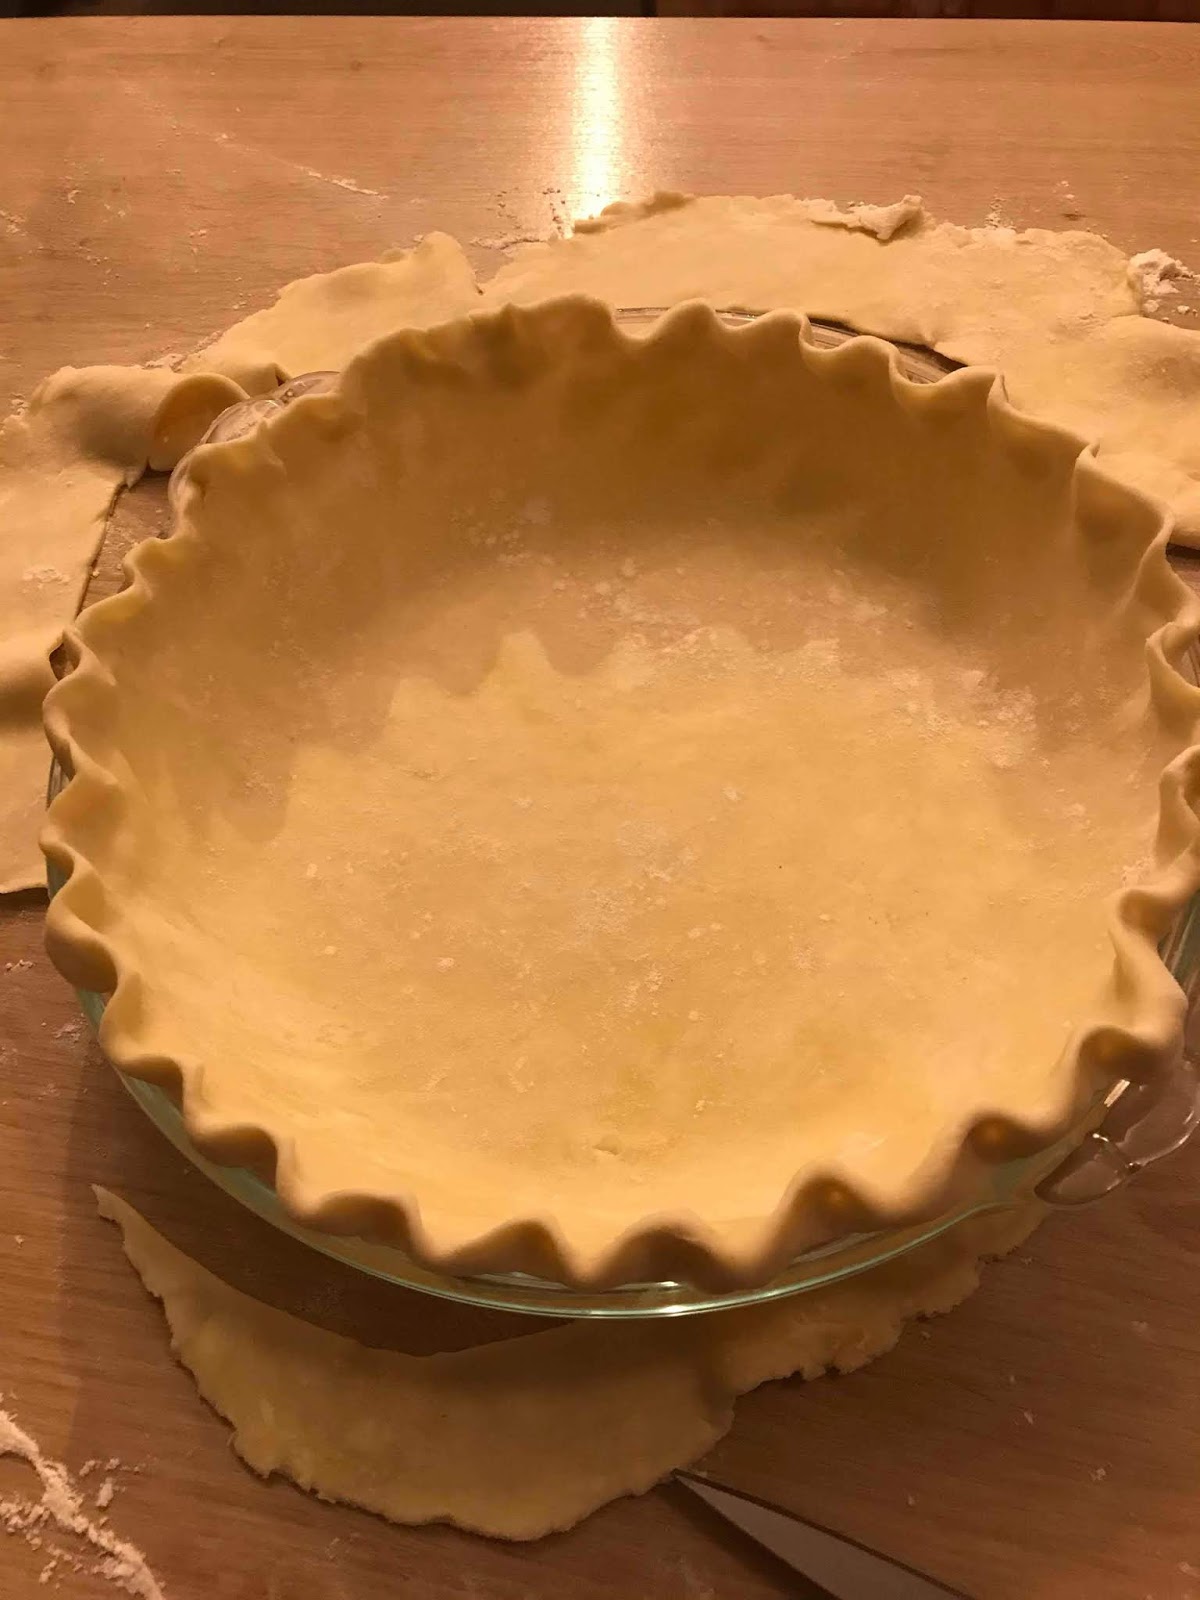
5. When ready to use: Lightly flour a flat surface and rolling pin. Roll out dough into about a 11 inch round. Have 9-inch pie pan waiting. Gently roll dough onto rolling pin, and unroll it into the pie pan. Cut pastry overhang in such a way that you can slightly fold under some excess to give yourself a thicker crust at the top. Using your knuckles, go around and create a scalloped edge. Poke the dough with a fork on the bottom some.


Pecan Filling

Ingredients:
4 eggs lightly beaten
1/2 cup granulated sugar
1/2 cup firmly packed light brown sugar
1 cup light corn syrup 
1 tbs all purpose flour
1 tsp vanilla extract
1/4 tsp salt
1/4 cup/57 grams melted butter
1 1/2 cup chopped pecans
1 cup pecan halves (or enough to cover the top)

Directions:
1. Heat the oven to 350 F/180 C. (Do not use convection setting.)

2. In a medium-sized bowl, beat the eggs, sugars, corn syrup, flour, vanilla and salt until well combined.

3. Stir in the melted butter and chopped pecans.

4. Pour the pecan filling into the pie crust.

5. Arrange pecans on top in any way you would like. (I chose concentric circles.)

6. Bake pie for 55-60 minutes, or until the filling stays firm when the pie is gently shaken. Cool on a wire rack.

Optional decorations:
Using seasonal cookie cutters (I used leaves and acorns), cut shapes  out of the overhang you cut off. Using a toothpick define some of the details (like the veins in the leaves and the texture of the acorn's "hat"). Place on a baking sheet and brush with and egg wash. Once the pie is out of the oven, pop the little pie crust pieces into the oven, and bake until they are golden brown (approx. 10 minutes, but keep an eye on them.) Allow them to cool, and arrange on top of pie.


Tips:
- You may want to place aluminum around the edge of your pie to avoid the crust browning too quickly. If you find that your pecans on the top are browning too quickly too, you can also cut a circle out of aluminum and place it on top. It will protect the pecans while still allowing the pie to keep baking.
- If you make it the day ahead, you can cover it, and leave it at room temperature.
- This is a very sweet dessert, which means you can always add some ice cream of whipped cream when serving it, to cut the richness a little.
- If you're in Europe, and can't find corn syrup, some Asian markets sell something called "golden syrup" which is an okay alternative. You can also substitute it with maple syrup, for something a little different.


Honestly, the pie turned out perfectly, and I had a very happy husband on my hands (and considering he - very gladly - made the turkey, homemade gravy, sweet potato casserole, green bean casserole and cranberry relish, I guess he deserved it, lol!).

If you decide to try this recipe, I would love to hear how it goes!
What's your favorite holiday dessert?

Thursday, October 17, 2019

Mmm... Chocolate Cupcakes!

It's National Chocolate Cupcake Day!
With these made-up "everyday is a holiday" days, I feel kind of torn - on the one hand it's getting crazy, and EVERYTHING has a day; on the other hand I love celebrating things that bring me joy, and chocolate cupcakes bring me joy.


While searching the internet, I came across this detailed recipe from Cupcake Project. It was great, I had all the ingredients on hand, and the cupcakes were delicious!


You should definitely go check out their recipe as she's got some good tips, but I'm gonna write it out for you too. 

Ingredients:
1 cup all-purpose flour
1/2 tsp salt
1/2 tsp baking soda
1/2 cup cocoa powder
1/4 cup unsalted butter (room temp.)
1 cup sugar
2 oz of your favorite chocolate (I used semi-sweet chocolate chips)
2 eggs (room temp.)
2 egg yolks (room temp.)
9 tbs sunflower oil
2 tsp vanilla 
1/3 cup sour cream
1/2 cup water (room temp.)


Directions:
1. Preheat oven to 350 F/175 C.
2. Prep your cupcake liners in your muffin pan. (I made home-made ones out of baking paper, and they worked amazingly! I'll share a DIY soon.)
3. Sift together your dry ingredients (flour, salt, baking soda, cocoa powder) into a medium-sized bowl.
4. Using the paddle attachment on your mixer, cream together butter and sugar.
5. (Carefully) Melt your chocolate. (Dutch oven method, or very short time increments in microwave.)
6. Once the melted chocolate is cool to the touch, add it to the sugar and butter mixture.
7. Keep mixer going. Add eggs and egg yolks one at a time, making sure each one is incorporated before you add the next. Mix until just combined.
8. Mix in vanilla, sour cream and oil until just combined.
9. With the mixer going, add the dry ingredient mixture in 3 portions, mixing just until incorporated each time.
10. Mix in water until just combined.
11. Fill cupcake liners until 2/3 full. (Since I had higher "tulip" liners, I filled them a little more.)
12. Check for doneness at 18 minutes. I ended up needing an extra 10 minutes, because I made mine bigger. Bake until a toothpick inserted comes out clean.
13. Take cupcakes out of the tin, place them on a cooling rack, and wait until they completely cool before trying to frost them.

(Makes 12-15, depending on size.)


As a bonus, here is my current favorite chocolate buttercream frosting:

Frosting:
- 3/4 cup room temperature butter
- 1/2 tsp vanilla extract
- pinch of salt
- 2 1/4 cup powdered sugar
- 3 tbs sweet and condensed milk
- about 4 tbs hot chocolate mix (like Nesquick)

The frosting was just the right amount for the cupcakes. Perfection.

I baked these to celebrate our son's first goal in soccer, and let me tell ya - I won all the mom points that day! Delicious!