Search This Blog

Showing posts with label sourdough bread. Show all posts

Friday, October 2, 2020

Pumpkin-Shaped Artisan Style Sourdough Bread

I have, along with much of the world delved into the world of sourdough baking. It has taken over my Instagram feed and posts, so if you're into that, I'd love it if you'd go give me a follow! :)


For the first day of fall, I made a pumpkin-shaped loaf, which quite frankly turned out adorable! I had a few people ask about it, so I decided to share my go-to sourdough recipe with you (I use The Prairie Homestead recipe with a couple alterations, and timed to my schedule), and finish off with my instructions on how to make it pumpkin-shaped. (I have a video tutorial in my highlights on Instagram as well.)


Ingredients:

3 cups (scooped and leveled) / (for me this came to) 480 grams all purpose flour (the internet says 3 cups should be more like 390 grams, I say, play around with it until you get a consistency you like/can work with)
1 1/4 cups / 300 grams lukewarm water
1 1/2 tsp salt
1 1/2 cup / 100 grams active sourdough starter

Tools:

Dutch oven
baking paper
sharp blade or knife
string (white or off white)
scissors
polenta/corn meal

Directions:


(I'm going to write the timing of this for what I do. It's basically a 24 hour process.)


1. I feed my starter first thing in the morning, 50 grams of water and 50 grams of flour. After about 5 hours, it’s reached its peak.


2. In a large bowl combine 3 cups of all purpose flour, 1 ¼ cup water, 1 ½ tsp salt. Using your hands combine it until it forms a shaggy dough. Cover your bowl with a dish cloth and allow it to rest for about 20 minutes. This is the autolyse portion. 


3. After the 20 minutes add ½ cup of your active starter. Combine it with your hands again, cover it with a dish towel, and leave it somewhere warm to rise. I use my laundry room. 


4. After ½ hour, perform a stretch and fold motion on your dough. Cover. Wait another ½ hour and repeat. Do this 2-4 times. After that, allow the dough to rise for 6-7 hours, or until it has doubled in size.


5. Lightly flour your surface, scrape out the bowl, and carefully (you don’t want to lose your precious bubbles), form your dough into either a ball or an oblong shape, depending on your proving basket. (For the pumpkin, I used a round one.)


6. Allow your dough to rest on the counter for about 30 minutes. 


7. Next, flour a dish towel, place it in your proving basket, place your dough inside, cover it with a dish towel, and place it in your fridge overnight.


8. In the morning, turn your oven to 430-435 F / 225 C. While it is warming up, pour some polenta or corn meal in the bottom of your dutch oven. The polenta helps the bottom of your bread not burn, and the reason you bake your bread in a dutch oven, is you create steam to better help your bread rise in the oven.


9. Place a sheet of baking paper on your counter. Cut 4 long pieces of string, lay them criss-cross, and tie them at the middle.


10. Remove your dough from the proving basket, place in the middle of the strings. Tie the stings in the middle - not too loosely, or you won't get those nice segments. Space out the string to make sure the segments are pretty equal. Cut the excess string off the top.


11. This is the fun part. We are going to score the bread. Use a straight blade or sharp knife. You can go as simple or as elaborate as you want! I've done just a simple slit in each section, but I've also done a couple different designs. (If you want, you could push a cinnamon stick into the top for a stem if you don't have a pumpkin stem.)


12. Once that is done, place the whole thing - bread and baking paper - in the a dutch oven. Place the lid on your dutch oven, and put it in the oven. Bake it for 20 minutes. At this point take off the lid, and bake it for another 25-30 minutes, depending on how brown you want your loaf to be.


13. Once you take your loaf out of the oven, unfortunately it is best to wait until it comes to room temperature before you try cutting into it. Cutting into it too early ruins your crumb, and doesn’t allow the middle to cook as well as it should.


14. Cut the strings, remove them from the bread, pop a pumpkin stem on top, and voila!


*For a non-pumpkin sourdough loaf, just skip the strings, and go ahead with scoring, and follow the rest of the recipe as written. 


Happy baking!

Tuesday, July 28, 2020

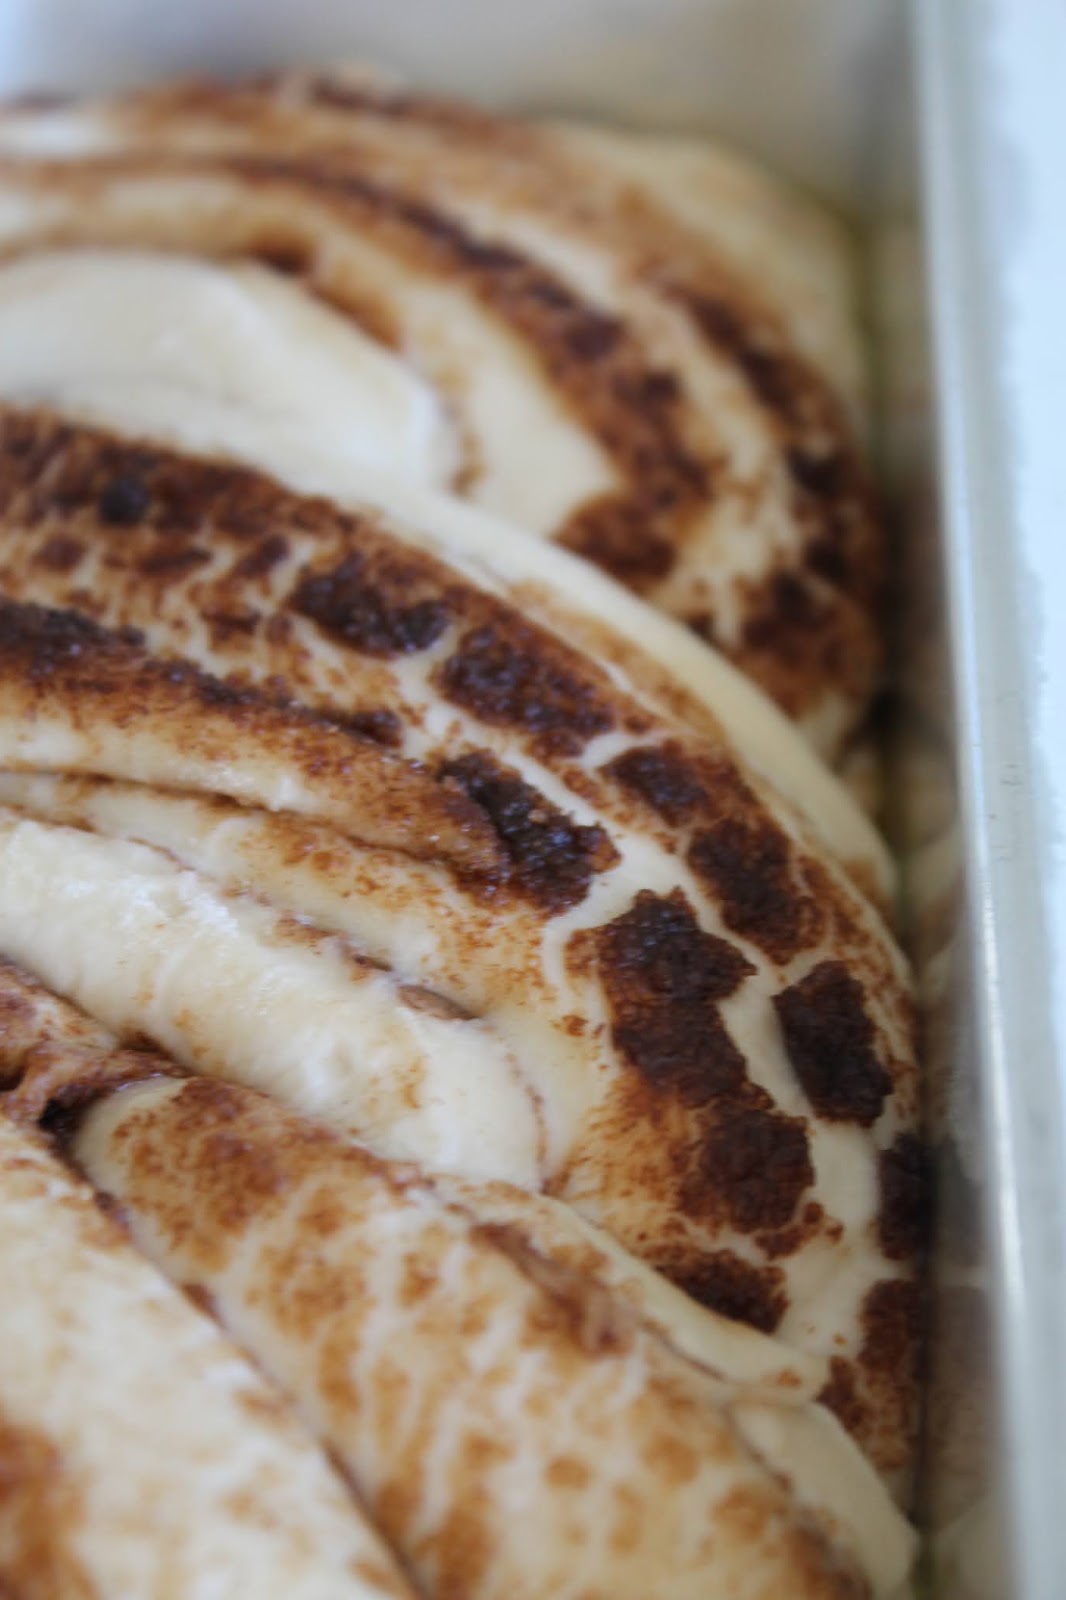
Cinnamon Twist Sourdough Sandwich bread

I have, as much of the world during this COVID-19 quarantine/shelter-in-place, jumped on the sourdough bandwagon. I'd say I'm sorry, but I am SO not. (And neither is my family.)

I am nowhere near mastering this yet, but I did come up with something on my own yesterday, so I am going to share it with you.

I have been using Melissa K Norris' sourdough sandwich bread, and we love it! (She has a great video for all of us visual learners!) I was in the mood for something a little sweet, maybe a little derivative of Pepperidge Farm's Cinnamon bread, with a little "babka" thrown in, and came up with this.

Not bad, huh?

You'll need:
- standing mixer with dough hook
- standard loaf pan
- rolling pin

Ingredients:
175 grams water (I've been using lukewarm water)
200 grams active sourdough starter
1 tbsp melted butter
1 1/2 tsp sugar
1 1/2 tsp salt
400 grams all purpose flour

+ olive oil for greasing
++ butter for very end

Cinnamon swirl:
1-2 tbsp melted butter (yep, more butter)
approx. 1/4 cup cinnamon sugar mixture (about 1:1 ratio)

Directions:
1. In a large mixing bowl combine water, starter and melted butter until fully combined.

2. Add sugar, salt and flour. Combine (by hand) until fully incorporated. Attach to your standing mixer, along with your dough hook, and knead on medium-low for 8-10 minutes. (I have found 9 minutes to be the sweet spot.) The dough should not stick to the bowl or your hands (much).

3. During this time, grease your loaf pan generously with olive oil.

4. Using a rolling pin, roll out into a rectangle on a lightly floured surface. Make sure the shorter end of the rectangle is about the size of the pan.

5. Brush the 1-2 tbsp melted butter onto the rectangle, then evenly spread the cinnamon sugar on top. (I didn't want it to be super sweet, but you could definitely add more cinnamon sugar if you want.)


6. Roll up the dough, just like you would with cinnamon rolls.

7. Using a knife, cut your loaf log in half (longwise), leaving about 1/2 inch connected at the top. 


8. Carefully twist the two sides to create "braid", tucking in the ends. Lift, and place in loaf pan.


9. Cover with a damp dish cloth, and set somewhere warm. (I use my laundry room.)

10. Allow to rise for about 5-6 hours.


11. Bake at 400 F/200 C for 30 minutes.

12. When you take it out of the oven, immediately brush some more butter on top. Allow to cool enough to remove from pan, then rub down the sides with a little extra butter, too. (What can I say!? Butter is awesome!)

13. Make sure you allow your bread to cool at least 30 minutes before you try to cut it. But once you do, and you see those (basically) magical cinnamon swirls... it's heaven!

This bread is perfect for breakfast toast, a not-so-sweet treat, or as French toast bread. Yummmm!


I'm so happy with how it turned out!
If you decide to give this baby a try, please let me know! I would love to know how it goes.