Search This Blog

Friday, October 2, 2020

Pumpkin-Shaped Artisan Style Sourdough Bread

I have, along with much of the world delved into the world of sourdough baking. It has taken over my Instagram feed and posts, so if you're into that, I'd love it if you'd go give me a follow! :)


For the first day of fall, I made a pumpkin-shaped loaf, which quite frankly turned out adorable! I had a few people ask about it, so I decided to share my go-to sourdough recipe with you (I use The Prairie Homestead recipe with a couple alterations, and timed to my schedule), and finish off with my instructions on how to make it pumpkin-shaped. (I have a video tutorial in my highlights on Instagram as well.)


Ingredients:

3 cups (scooped and leveled) / (for me this came to) 480 grams all purpose flour (the internet says 3 cups should be more like 390 grams, I say, play around with it until you get a consistency you like/can work with)
1 1/4 cups / 300 grams lukewarm water
1 1/2 tsp salt
1 1/2 cup / 100 grams active sourdough starter

Tools:

Dutch oven
baking paper
sharp blade or knife
string (white or off white)
scissors
polenta/corn meal

Directions:


(I'm going to write the timing of this for what I do. It's basically a 24 hour process.)


1. I feed my starter first thing in the morning, 50 grams of water and 50 grams of flour. After about 5 hours, it’s reached its peak.


2. In a large bowl combine 3 cups of all purpose flour, 1 ¼ cup water, 1 ½ tsp salt. Using your hands combine it until it forms a shaggy dough. Cover your bowl with a dish cloth and allow it to rest for about 20 minutes. This is the autolyse portion. 


3. After the 20 minutes add ½ cup of your active starter. Combine it with your hands again, cover it with a dish towel, and leave it somewhere warm to rise. I use my laundry room. 


4. After ½ hour, perform a stretch and fold motion on your dough. Cover. Wait another ½ hour and repeat. Do this 2-4 times. After that, allow the dough to rise for 6-7 hours, or until it has doubled in size.


5. Lightly flour your surface, scrape out the bowl, and carefully (you don’t want to lose your precious bubbles), form your dough into either a ball or an oblong shape, depending on your proving basket. (For the pumpkin, I used a round one.)


6. Allow your dough to rest on the counter for about 30 minutes. 


7. Next, flour a dish towel, place it in your proving basket, place your dough inside, cover it with a dish towel, and place it in your fridge overnight.


8. In the morning, turn your oven to 430-435 F / 225 C. While it is warming up, pour some polenta or corn meal in the bottom of your dutch oven. The polenta helps the bottom of your bread not burn, and the reason you bake your bread in a dutch oven, is you create steam to better help your bread rise in the oven.


9. Place a sheet of baking paper on your counter. Cut 4 long pieces of string, lay them criss-cross, and tie them at the middle.


10. Remove your dough from the proving basket, place in the middle of the strings. Tie the stings in the middle - not too loosely, or you won't get those nice segments. Space out the string to make sure the segments are pretty equal. Cut the excess string off the top.


11. This is the fun part. We are going to score the bread. Use a straight blade or sharp knife. You can go as simple or as elaborate as you want! I've done just a simple slit in each section, but I've also done a couple different designs. (If you want, you could push a cinnamon stick into the top for a stem if you don't have a pumpkin stem.)


12. Once that is done, place the whole thing - bread and baking paper - in the a dutch oven. Place the lid on your dutch oven, and put it in the oven. Bake it for 20 minutes. At this point take off the lid, and bake it for another 25-30 minutes, depending on how brown you want your loaf to be.


13. Once you take your loaf out of the oven, unfortunately it is best to wait until it comes to room temperature before you try cutting into it. Cutting into it too early ruins your crumb, and doesn’t allow the middle to cook as well as it should.


14. Cut the strings, remove them from the bread, pop a pumpkin stem on top, and voila!


*For a non-pumpkin sourdough loaf, just skip the strings, and go ahead with scoring, and follow the rest of the recipe as written. 


Happy baking!

Tuesday, September 15, 2020

Fun And Chic Backyard Llama Party - On A Budget

I love parties. I love to think on them, plan them and then have it all come together. Color schemes get me excited, and although baking challenges scare me, I enjoy pushing myself to make something new.


This year especially, with everything going on (2020, amirite???), we decided to make our daughter's 2nd birthday party as budget-friendly as possible. This meant getting creative, and doing a lot of prep work ahead of time, but we managed to pull off a great party that was as fun and colorful as our little girl.

I thought others may find themselves in a similar situation - wanting to give your kid an unforgettable party, but also trying to be budget-conscious - so I decided to give you a few ideas on how to do just that.


1. Plan ahead - way ahead

Okay, I know not everyone gets as excited about kids' birthday parties as I do, but I generally have my kids' themes in mind months before their birthday. This allows me to buy things when they are on sale. For example, I knew I wanted these specific llama plates and napkins, and I knew which store carried them, so I kept an eye on them, and bought them when they were having a 25% off party items sale. This also can work with things like candles (pink and red ones are on sale after Valentine's Day), candy (after Halloween), fiesta decor (after Cinco de Mayo), etc. 


2. Dried flowers (use what you have)

I have a stash of dried flowers and branches and stuff. I have everything from cotton, to poppy pods, billy balls (craspedia), etc. I have collected them over the years, and use them interchangeably. I tend to stay within similar color schemes in my home and for parties, so having them already on hand helps. Dried flowers ended up being a great choice anyway, because it was so blasted hot, any fresh flowers would've withered in minutes.

In addition, I used vases I've had for years, and instead of buying bottled water, we kept refilling a couple glass bottles with water. (Except for a couple large bottles of Radenska, because Slovenian pride, woot-woot!)


3. YouTube How-To Videos/Pinterest

I watched so many how-to videos on YouTube in the past couple months! You can literally find everything on there! I'll reference back to this in my next points, but it deserves its own mention. Also, Pinterest is of course great for inspiration, but you can also find a lot of tutorials, which is fantastic for us visual learners.

4. Home-made decorations

I know not everyone feels crafty, but the decorations I made for my daughter's party were beyond easy, and very affordable.

I really wanted a garland, but they are ridiculously expensive, and I had a large wall I needed them to fit, which meant I was looking at at least 2 of them. Tassels go with the llama theme, but they are also just "in" right now, and oh so easy to make. 

So, I bought some yarn (in the colors of the party) which you can find for really great prices (in Slovenia you can find them at Svet Metraž or at Tedi, and in the States any craft store, or Walmart). I measured the length of my wall, then I measured out how spaced out I wanted them, and started making tassels in the evenings while watching TV, lol.


If you've never made a tassel before, it is beyond simple. There are numerous youtube tutorials out there, such as this one.

After I made the tassels, I sewed them (you could hot glue) to a piece of jute/twine that was the length of my wall.

Once I had that finished, I realized I had a bunch more yard, so I made a second garland to go around the table.


I still had yarn, so instead of buying a number balloon this year, I cut out a number 2 shape from cardboard, and then wrapped it in yarn (using hot glue to adhere it at the back).


I STILL had more yarn left, so I used it as ribbon on my daughter's birthday present. That yarn was the best thing I could've bought!


5. Cook/make/bake whatever you can for food

I've been baking bread (#thanksquarantine), so we decided to have sandwiches, for which I baked the bread the day before.


We also made a veggie tray instead of buying it (not that you could find one here, anyway) - it took one cucumber, 2 carrots, 1 1/2 bell peppers, a small container of cherry tomatoes, and then my husband made a sour cream dip. These were all things we normally already have on hand, so score one for the home team!


One of my favorite parts of the fiesta was this cactus watermelon.


I found an image of something like this on Pinterest, then watched a couple tutorials I found on YouTube, and got to work! It was actually easier than I thought it would be, although you do have to be careful, because as soon as you cut into a watermelon it wants to crack all over. But we did it, yay! (Luckily for us it's still watermelon season, so it was easy to find.) 


6. Bake the cake/cookies/dessert yourself

I've only been really baking for about 3 years, so trust me, I've been there. For our son's birthdays in the past we totally ordered a cake. BUT, I really had this specific cake in mind, and thought that if I tried really hard, I could do it.

I got my inspiration from Peggy Porschen Cakes. I used Chelsweets vanilla cake and buttercream frosting recipe. I added a little more cream than the recipe says (although she suggests doing exactly that to achieve the desired consistency). I made her recipe exactly, and it was just enough frosting. If I were to do something more elaborate with the frosting, I would've made a 1.5 batch, but it was perfect for my needs.

I baked the cake layers 3 days in advance and froze them (according to her instructions). This made them easier to torte and frost.

I frosted the cake the day before the party, and stored it in my fridge. (Again, I watched a LOT of tutorials on how to frost a cake as smoothly as possible. Mine isn't perfect, but considering it's only the second or third cake I've every frosted, I'm happy with the results.)


Now the cookies. Ah, the cookies. So, I'm not going to lie, these were hard, and took a couple days' work, but were totally worth it in the end. 

About a week before the party, I baked the cookies (I have my favorite recipe here), then I put them in the freezer. 


A couple days before the party, I made my icing according to Ann Clark's royal icing recipe (their website is also where I found the cookie cutters). 

I watched a bunch of "llama sugar cookie decorating" videos (mainly to see the order in which they iced certain parts). Then, I spent a whole day (thank goodness for school) icing the cookies.


Then, on the day of the party, I assembled it all, and was thrilled with the final result!


7. "Entertainment"

Since we were having the party in our backyard, we once again just worked with what we had. The kids spent the majority of the time on the trampoline, we took the kids' play tent outside, along with some Mega Bloks and our a doll house. We also had a little "coloring station", which I'm not gonna lie, not a single kid cared about, lol!


OH! And we had a piñata! Which was a complete hit! (Get it?)


And there you go! A very budget-friendly and super cute backyard llama party! At the end of the day, what the kids remember the most is that so many people who love them were there, and that they got to eat a couple too many cookies. And that, we had in spades!


Monday, August 3, 2020

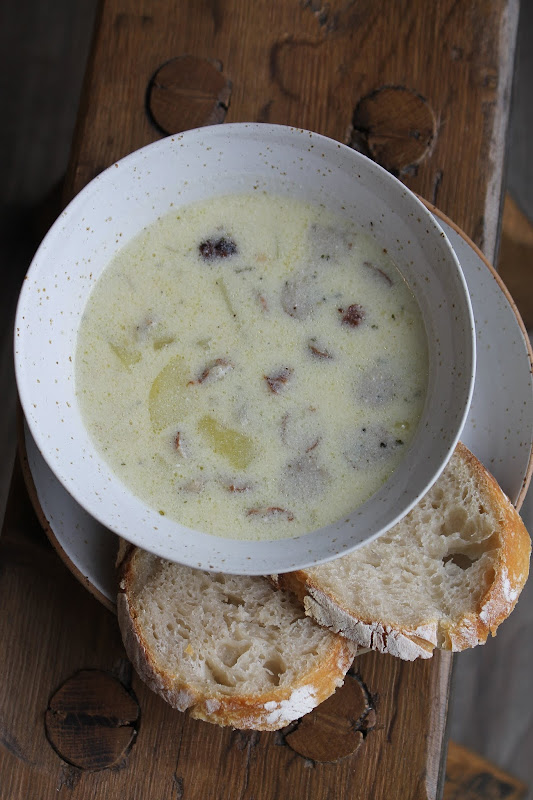
Hungarian Sour Cream and Potato Soup


Today is a rainy dreary day, which in my mind calls for soup.
This is my Hungarian grandma's go-to soup whenever we were home sick, or needed some comfort food. When I made it this time I "beefed" it up a little to make it a whole meal instead of a first course, but it turned out delicious, and I'm here to share the recipe with you!

Ingredients:
5-6 (egg-sized) potatoes
4 1/2 cups water
3/4 cup sour cream
1 tablespoon vegetable oil
1 tablespoon flour
1 tsp salt
1 tsp pepper
Vegeta (a European vegetable spice mix, similar to Mrs. Dash. The amount of this you'll use is very subjective. I like a lot.)

+ optional, but I used them in this time around
1 small onion sautéed in butter
7-8 breakfast-type sausage links fried up in a pan, then cut into chunks

Directions:

1. Fill large pot with the 4 1/2 cups water. Peal and dice potatoes into bite sized pieces, and place in water.

2. Add salt and pepper, and a tbsp of Vegeta. 

3. Bring the potatoes to a boil, then reduce to medium heat, and cook until cooked through (can easily stick a fork in the potato.)

4. If adding the sausage and onions, cook up those while the potatoes are cooking.

5. Also during this time, in a small pan on a low/medium heat combine the flour and oil to create a roux, your thickening agent. Heat  until the color gets slightly darker, then take off heat.

6. Once the potatoes are cooked through, add the roux to the pot.

7. Measure out your sour cream into a bowl. Ladle some soup broth into the sour cream and combine. Add another ladle, fully incorporate, then pour that into the soup. (Doing it this way will ensure that the sour cream doesn't clump up.)

8. Add your sausage and onions.

9. Taste your soup broth, add more Vegeta if needed.


Serve with some delicious bread (in the pictures you can see my homemade sourdough, yum!), and you're good to go!


This soup stores well in the fridge, and may even be better the next day!


And this is my Mary, the original woman behind this recipe!
She is most dear to my heart. <3

Tuesday, July 28, 2020

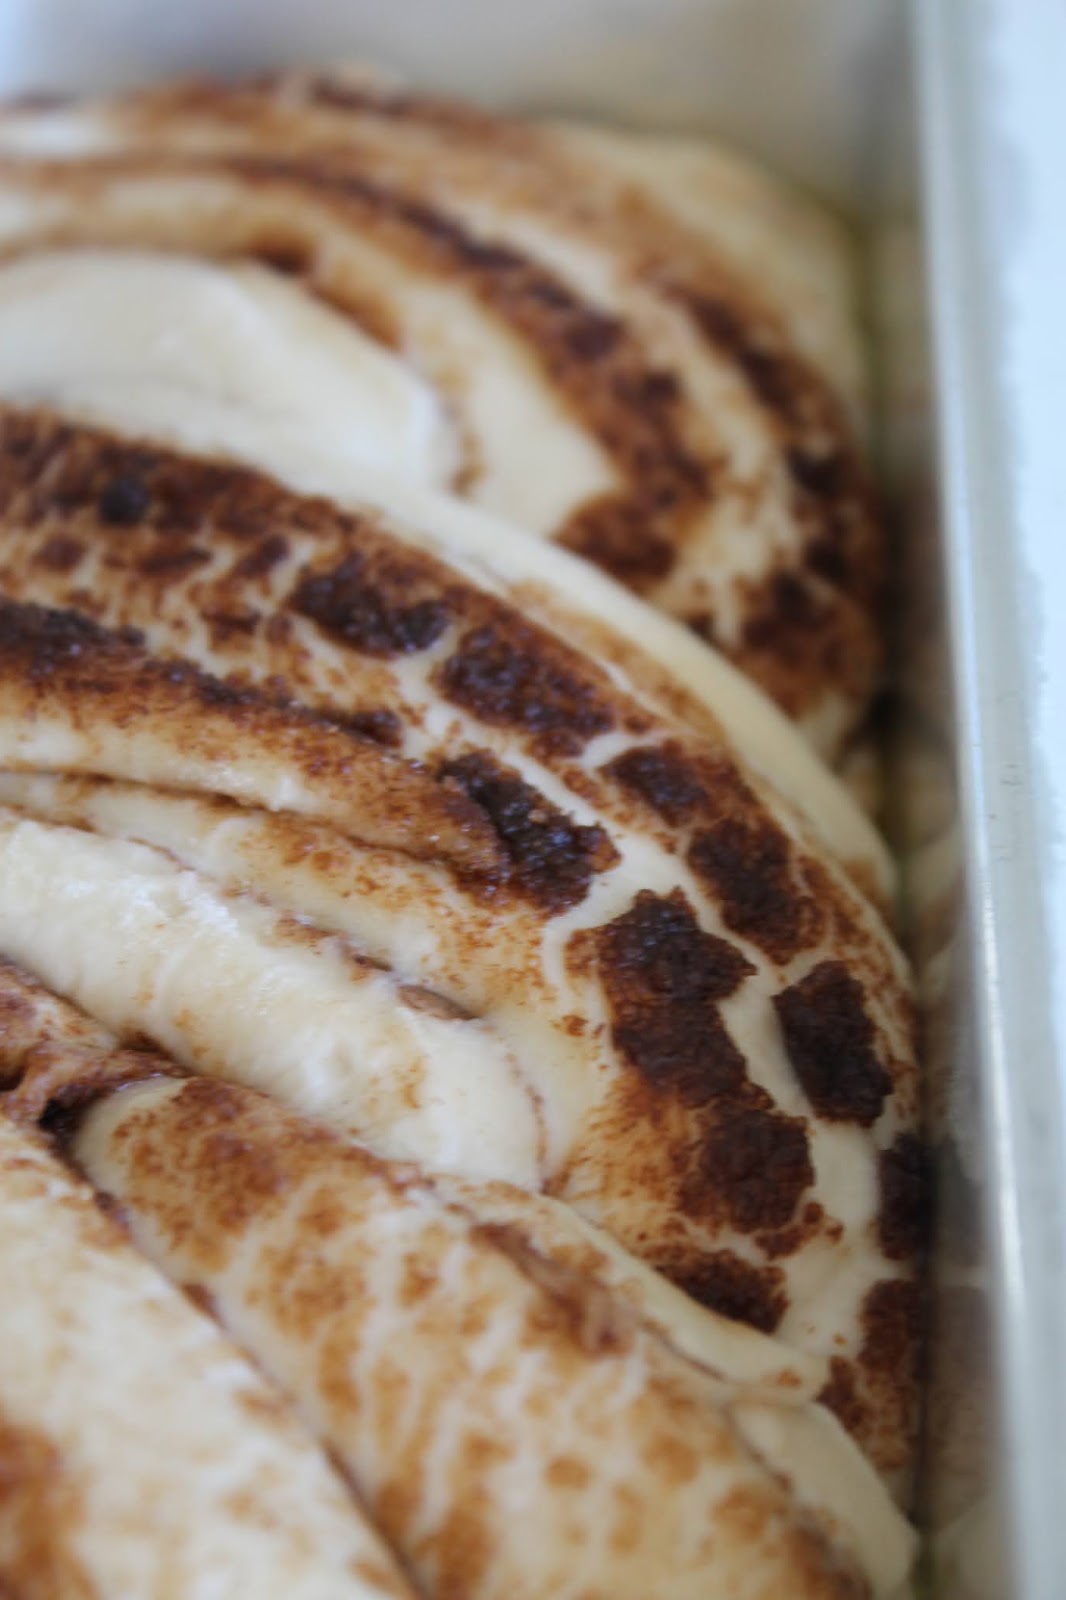
Cinnamon Twist Sourdough Sandwich bread

I have, as much of the world during this COVID-19 quarantine/shelter-in-place, jumped on the sourdough bandwagon. I'd say I'm sorry, but I am SO not. (And neither is my family.)

I am nowhere near mastering this yet, but I did come up with something on my own yesterday, so I am going to share it with you.

I have been using Melissa K Norris' sourdough sandwich bread, and we love it! (She has a great video for all of us visual learners!) I was in the mood for something a little sweet, maybe a little derivative of Pepperidge Farm's Cinnamon bread, with a little "babka" thrown in, and came up with this.

Not bad, huh?

You'll need:
- standing mixer with dough hook
- standard loaf pan
- rolling pin

Ingredients:
175 grams water (I've been using lukewarm water)
200 grams active sourdough starter
1 tbsp melted butter
1 1/2 tsp sugar
1 1/2 tsp salt
400 grams all purpose flour

+ olive oil for greasing
++ butter for very end

Cinnamon swirl:
1-2 tbsp melted butter (yep, more butter)
approx. 1/4 cup cinnamon sugar mixture (about 1:1 ratio)

Directions:
1. In a large mixing bowl combine water, starter and melted butter until fully combined.

2. Add sugar, salt and flour. Combine (by hand) until fully incorporated. Attach to your standing mixer, along with your dough hook, and knead on medium-low for 8-10 minutes. (I have found 9 minutes to be the sweet spot.) The dough should not stick to the bowl or your hands (much).

3. During this time, grease your loaf pan generously with olive oil.

4. Using a rolling pin, roll out into a rectangle on a lightly floured surface. Make sure the shorter end of the rectangle is about the size of the pan.

5. Brush the 1-2 tbsp melted butter onto the rectangle, then evenly spread the cinnamon sugar on top. (I didn't want it to be super sweet, but you could definitely add more cinnamon sugar if you want.)


6. Roll up the dough, just like you would with cinnamon rolls.

7. Using a knife, cut your loaf log in half (longwise), leaving about 1/2 inch connected at the top. 


8. Carefully twist the two sides to create "braid", tucking in the ends. Lift, and place in loaf pan.


9. Cover with a damp dish cloth, and set somewhere warm. (I use my laundry room.)

10. Allow to rise for about 5-6 hours.


11. Bake at 400 F/200 C for 30 minutes.

12. When you take it out of the oven, immediately brush some more butter on top. Allow to cool enough to remove from pan, then rub down the sides with a little extra butter, too. (What can I say!? Butter is awesome!)

13. Make sure you allow your bread to cool at least 30 minutes before you try to cut it. But once you do, and you see those (basically) magical cinnamon swirls... it's heaven!

This bread is perfect for breakfast toast, a not-so-sweet treat, or as French toast bread. Yummmm!


I'm so happy with how it turned out!
If you decide to give this baby a try, please let me know! I would love to know how it goes.