Search This Blog

Monday, August 3, 2020

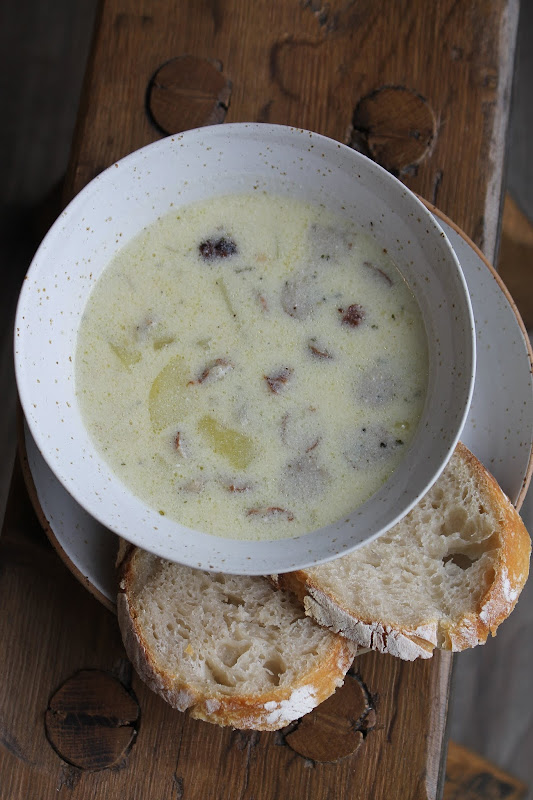
Hungarian Sour Cream and Potato Soup


Today is a rainy dreary day, which in my mind calls for soup.
This is my Hungarian grandma's go-to soup whenever we were home sick, or needed some comfort food. When I made it this time I "beefed" it up a little to make it a whole meal instead of a first course, but it turned out delicious, and I'm here to share the recipe with you!

Ingredients:
5-6 (egg-sized) potatoes
4 1/2 cups water
3/4 cup sour cream
1 tablespoon vegetable oil
1 tablespoon flour
1 tsp salt
1 tsp pepper
Vegeta (a European vegetable spice mix, similar to Mrs. Dash. The amount of this you'll use is very subjective. I like a lot.)

+ optional, but I used them in this time around
1 small onion sautéed in butter
7-8 breakfast-type sausage links fried up in a pan, then cut into chunks

Directions:

1. Fill large pot with the 4 1/2 cups water. Peal and dice potatoes into bite sized pieces, and place in water.

2. Add salt and pepper, and a tbsp of Vegeta. 

3. Bring the potatoes to a boil, then reduce to medium heat, and cook until cooked through (can easily stick a fork in the potato.)

4. If adding the sausage and onions, cook up those while the potatoes are cooking.

5. Also during this time, in a small pan on a low/medium heat combine the flour and oil to create a roux, your thickening agent. Heat  until the color gets slightly darker, then take off heat.

6. Once the potatoes are cooked through, add the roux to the pot.

7. Measure out your sour cream into a bowl. Ladle some soup broth into the sour cream and combine. Add another ladle, fully incorporate, then pour that into the soup. (Doing it this way will ensure that the sour cream doesn't clump up.)

8. Add your sausage and onions.

9. Taste your soup broth, add more Vegeta if needed.


Serve with some delicious bread (in the pictures you can see my homemade sourdough, yum!), and you're good to go!


This soup stores well in the fridge, and may even be better the next day!


And this is my Mary, the original woman behind this recipe!
She is most dear to my heart. <3

Tuesday, July 28, 2020

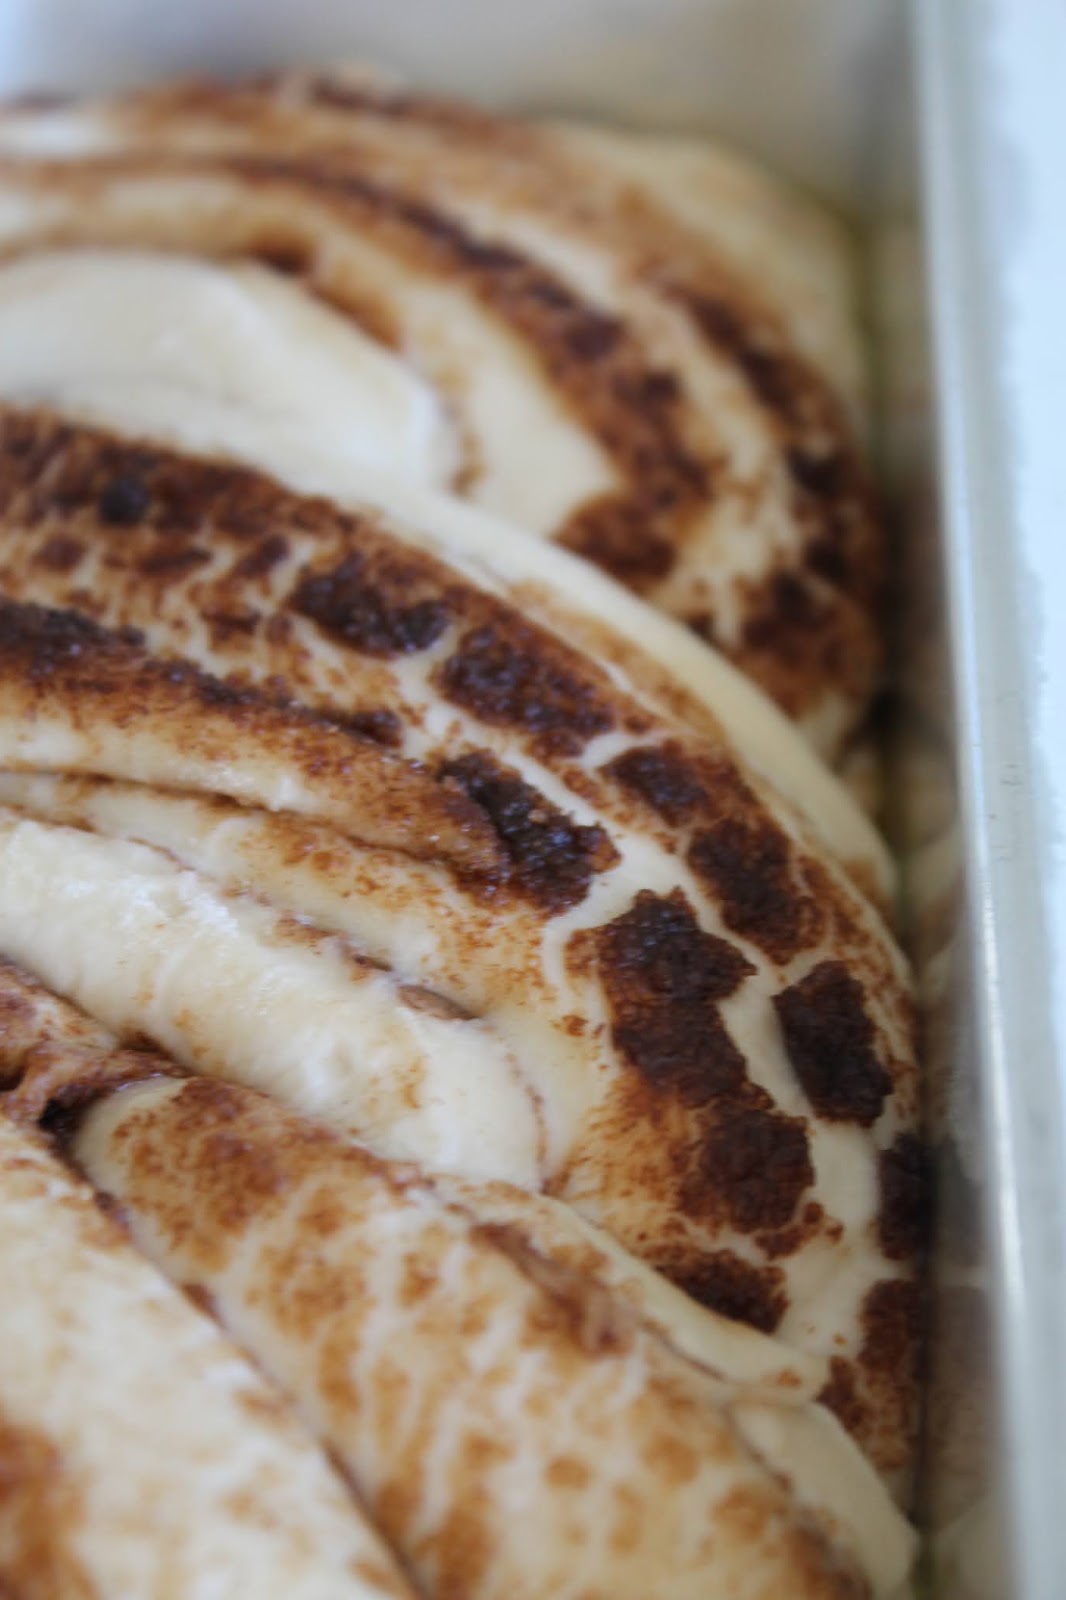
Cinnamon Twist Sourdough Sandwich bread

I have, as much of the world during this COVID-19 quarantine/shelter-in-place, jumped on the sourdough bandwagon. I'd say I'm sorry, but I am SO not. (And neither is my family.)

I am nowhere near mastering this yet, but I did come up with something on my own yesterday, so I am going to share it with you.

I have been using Melissa K Norris' sourdough sandwich bread, and we love it! (She has a great video for all of us visual learners!) I was in the mood for something a little sweet, maybe a little derivative of Pepperidge Farm's Cinnamon bread, with a little "babka" thrown in, and came up with this.

Not bad, huh?

You'll need:
- standing mixer with dough hook
- standard loaf pan
- rolling pin

Ingredients:
175 grams water (I've been using lukewarm water)
200 grams active sourdough starter
1 tbsp melted butter
1 1/2 tsp sugar
1 1/2 tsp salt
400 grams all purpose flour

+ olive oil for greasing
++ butter for very end

Cinnamon swirl:
1-2 tbsp melted butter (yep, more butter)
approx. 1/4 cup cinnamon sugar mixture (about 1:1 ratio)

Directions:
1. In a large mixing bowl combine water, starter and melted butter until fully combined.

2. Add sugar, salt and flour. Combine (by hand) until fully incorporated. Attach to your standing mixer, along with your dough hook, and knead on medium-low for 8-10 minutes. (I have found 9 minutes to be the sweet spot.) The dough should not stick to the bowl or your hands (much).

3. During this time, grease your loaf pan generously with olive oil.

4. Using a rolling pin, roll out into a rectangle on a lightly floured surface. Make sure the shorter end of the rectangle is about the size of the pan.

5. Brush the 1-2 tbsp melted butter onto the rectangle, then evenly spread the cinnamon sugar on top. (I didn't want it to be super sweet, but you could definitely add more cinnamon sugar if you want.)


6. Roll up the dough, just like you would with cinnamon rolls.

7. Using a knife, cut your loaf log in half (longwise), leaving about 1/2 inch connected at the top. 


8. Carefully twist the two sides to create "braid", tucking in the ends. Lift, and place in loaf pan.


9. Cover with a damp dish cloth, and set somewhere warm. (I use my laundry room.)

10. Allow to rise for about 5-6 hours.


11. Bake at 400 F/200 C for 30 minutes.

12. When you take it out of the oven, immediately brush some more butter on top. Allow to cool enough to remove from pan, then rub down the sides with a little extra butter, too. (What can I say!? Butter is awesome!)

13. Make sure you allow your bread to cool at least 30 minutes before you try to cut it. But once you do, and you see those (basically) magical cinnamon swirls... it's heaven!

This bread is perfect for breakfast toast, a not-so-sweet treat, or as French toast bread. Yummmm!


I'm so happy with how it turned out!
If you decide to give this baby a try, please let me know! I would love to know how it goes.

Wednesday, June 10, 2020

Blueberry Lavender Lemon Loaf

I've been all about those loaf recipes lately. I also perfected my Copy Cat Starbucks Lemon Loaf, and wanted to take it a step further:

Enter the Blueberry Lavender Lemon Loaf!


This cake/loaf is the perfect addition to a coffee date, a tea party, or just because. It is super moist, and I love the color of the blueberries popping on the top!


The glaze is delicious, and you can be however generous you want to be with it - you can drench it, like I did, or drizzle it on top. I think in hindsight, I might've drizzled it, as I lost all the gorgeous blueberries at the top by covering them. Either way, this loaf is a crowd-pleaser!


oops. my littlest helper approves of the glaze.


Ingredients:

Lemon Pound Cake:
2 cups all-purpose flour
1 1/4 tsp baking powder
1/2 tsp salt
1 cup granulated sugar
1 tbsp lemon zest
1/2 cup buttermilk
1/2 cup sunflower (or canola) oil
1/2 cup (fresh) lemon juice
2 large eggs
1 tsp vanilla
2 tbsp finely crushed dried culinary lavender
1 cup blueberries

Glaze:
1 cup powdered sugar
1 tsp lemon juice
1 tbsp cream
1-2 tbsp lavender simple syrup (depending on desired consistency)


Directions:

1. Preheat oven to 350 F /175 C.

2. Grease and flour a loaf pan.

3. In a medium bowl whisk together flour, baking powder, salt and lavender until combined. Set aside.

4. In a separate, smaller bowl combine lemon zest and sugar with a fork. Set aside.

5. In the bowl of a standing mixer, using the paddle attachment combine buttermilk, oil, lemon juice, eggs and vanilla. Mix on a low speed until the ingredients are combined.

6. Add the flour mixture and sugar mixture, and continue to mix until smooth and fully combined.

7. Carefully stir in the blueberries.

8. Transfer the batter into the greased loaf pan, and bake for 50-55 minutes, or until golden brown and a toothpick inserted comes out clean. (If the top is starting to brown too quickly, you can tent aluminum foil on it.)

9. Remove from oven, and allow to fully cool. Remove from pan.

10. Combine powdered sugar, cream, lemon juice and lavender simple syrup until glaze forms, then spoon and smooth over the loaf. 


And there you have it! 
As delicious as it is beautiful!
What fruit would you like to see in my next attempt?

Tuesday, May 26, 2020

Geometric Cross Wall Art

Hey, friends!

You may or may not know, but our family lives in Slovenia to help the local Pentecostal churches - specifically in Ptuj at the moment.
The pastor of the church asked my husband and I to help them make the kids' Sunday school room more kid-friendly, and we were thrilled to do so!


As any self-respecting person living in 2020, I began my search on Pinterest. I didn't know exactly what I wanted, but I did know that I wanted something that was somehow modern and timeless at the same time. I found this great idea and saved it, but unfortunately by the time we went to paint it this past weekend the link was dead. 

So, I decided to put my own tutorial out there, in case someone found themselves in the same boat.

Tools:
- Paint brushes in different sizes (we didn't end up needing any big ones, as our triangle shapes were small.)
- 11 different colors of wall paint (you don't have to copy our colors exactly of course, just try to keep all of your colors in harmony with one another. We ended up with lots of jewel tones, and I love it!) You won't need a lot of each color, so you can buy the smallest paint bucket size they offer.
- Painter's tape - a small size. Ours was about an inch in width.
- Measuring tape.
- A level.
- Drop cloth.

Steps:
1. If you want an accent wall, start with that. We didn't paint the accent wall in this room, so I won't be giving steps on that. :)

2. The first thing you are going to want to do, is put down your drop cloth. I'm pretty klutzy, so this is especially important for me, ha!

3. Next, you will measure out the cross. You can make it any size you want to fit your wall, but these are the measurements we used: 


We measured outside of tape to outside of tape. You will need to use the level to make sure your lines are straight up and down, or horizontally. (This was especially hard, because the wall itself wasn't straight everywhere.) We started with the line on the very bottom. We knew we wanted the outlet to be part of the white cross so we wouldn't have to paint it. We chose a length we liked, and stuck painter's tape on the wall for that length. Next we measured up 130 cm, made a little mark on the wall with a pencil, then slid the level up the wall as we taped. We did the same on the other side, but were able to have a more accurate "point" made with the pencil, as we could measure side-to-side as well as top-to-bottom. We continued this until the whole cross was measured and taped out. Honestly, this was one of the hardest parts, as we started with no frame of reference. It took about an hour just for the cross.


4. Now for the fun part! Taking the painter's tape, we taped strips of it all over the wall to create mostly triangles, but all sorts of geometric shapes, in different sizes. We wanted connecting shapesn all around the cross, with it tapering off on the right. So, at first they're only separated by the tape, then there are some bigger stand-alone triangles, and finally some small ones.


5. After it's all done, make sure you go over all of it one last time, pressing your fingers or fingernail over it to really "seal" it, otherwise the paint will bleed.

6. And now the painting. (Shake paint VERY well before use.) We decided to go one color at a time once, then going over a second time to fill in any gaps. It was hard to gauge how many of each color to paint, and we definitely could have painted more the first time around, but this worked well, too. Our one rule was that a same color could not be touching itself. Also, we tried to visually space them out as well as we could. 

Tips: 
- Make sure your brush isn't "drippy", as you can easily drip paint on the color below where you are working. We speak from experience.
- The darker colors will need an extra coat or two.
- It is VERY easy to paint past the painter's tape because it is thinner than people usually work with, so paint with care.
- Make sure you paint all the way into the corners so they will look nice and crisp.


7. Apparently the best time to remove painter's tape is once the paint is dry to the touch so that it won't adhere to the tape. We didn't know this, and even if we had, we started removing tape as soon as we were done painting, but some of our darker paint colors came off with the tape. AAAAHHH! 
So, here are some tips:
- Be careful in pulling up the tape When you come to an "intersection" of tape, remove each one individually. 
- It's okay if you need to go back over some of the shapes to fix them. Just tape that part again, paint, and remove the tape once it is dry to the touch.

8. Once all the tape is removed, stand back and admire the result of your hard work!


And there is is! 
I hope that this wall is loved for many years.

Have you ever painted any sort of wall art or mural? How did it go? Was it a bigger task than you initially thought, lol?

Thursday, May 21, 2020

Lavender Simple Syrup


Honestly, this recipe is so simple and easy, I almost feel silly sharing it, bur I am planning on using this syrup in upcoming recipes, so I wanted to be able to refer you guys to this fun and easy lavender simple syrup recipe.

Syrups are pretty common in our part of the world - they are added to water (sparkling or still) as a way to have "juice". My Hungarian grandma used to make us drinks with her homemade syrups and a seller bottle.

Syrups are great for adding flavor to lemonade, iced (or hot) teas, icing, frosting, cocktails, cakes... the possibilities are endless. 

So, with my lavender plants and other herbs in full bloom I decided to take a crack at it.


Tools you'll need:
- small pot
- funnel
- small sieve
- glass jars
- optional: twine and lavender for "packaging"


Ingredients:
1 cup white sugar
1 cup water
2 tbsp fresh food grade lavender flowers


Notes:
- if you're using lavender from your garden, you're going to need to wash it, and pinch/snap off the flower buds.
- you don't have to use white sugar, you can use unrefined sugar (which I used later for my mint syrup), just keep in mind that it will change the color of your syrup. You can also try honey, or alternative sugars, such as coconut sugar.
- technically all lavender is edible, as in it won't hurt you, but for cooking and baking you should use food grade lavender. Unless the plant (or buds) say explicitly that it is meant for food, you shouldn't use it. That kind of lavender is perfect for making essential oils, for making potpourri satchels, to dry to use in your home, or just to cut and place in water. Your best bet for finding a food grade lavender plant is at a plant nursery, or perhaps a hardware store.
- you can infuse simple syrups with just about anything, especially herbs. After the lavender one I made a mint one, and I'm pretty sure I'm going to make a thyme one, too. It's addicting, and I'm sorry to have drug you along on this with me, ha!


Directions:
1. Place all the ingredients in a small pot. Bring to a boil on a medium-high heat, ensuring that all of the sugar dissolves. Then bring heat down to a low heat, and allow to simmer for 20-30 minutes, keeping in mind that the longer you simmer it, the stronger the flavor will be. (This is a great excuse to taste-test your syrup along the way.)

2. Using the sieve and funnel, pour your syrup into your jars. Place them in the fridge to cool, and voila! They should last 2-3 weeks in the fridge. If you want to jazz them up, or if you're giving them as a gift, you can make a little tag, or wrap twine around them and add a sprig of lavender.


This is an effortless way to elevate drinks and baked goods, and plus, it's just really fun!

For some extra fun, here is my mint simple syrup:
I had to use raw sugar, because I ran out of white, but I am kind of digging the brown. <3
For this recipe, follow the same instructions, just swap the 2 tbsp lavender with 1 cup of fresh mint.


Friday, May 15, 2020

Copycat Starbucks Lemon Loaf

You know when you get a craving...


I've been craving a slice of Starbucks lemon loaf. But there is no Starbucks in my COUNTRY!!! And then there's lockdown.

So, I tried another blogger's recipe, and was a little under-impressed. The icing was top notch and tasted just right, but the cake was way to "bread"-y. It dried out fast, too.

That's when I remembered a yummy cranberry and orange loaf I had made at Thanksgiving that was deeeelish, and already reminded me of the lemon loaf when I made it, and thought I could perhaps make it a lemon loaf instead. And it did! And it was fantastic! Way better! Here you go!


Ingredients:

Lemon Pound Cake:
2 cups all-purpose flour
1 1/4 tsp baking powder
1/2 tsp salt
1 cup granulated sugar
1 tbsp lemon zest
1/2 cup buttermilk
1/2 cup sunflower (or canola) oil
1/2 cup (fresh) lemon juice
2 large eggs
1 tsp vanilla

Glaze:
1 cup powdered sugar
1 tbsp lemon juice
1 tbsp cream

Directions:

1. Preheat oven to 350 F /175 C.

2. Grease and flour a loaf pan.

3. In a medium bowl whisk together flour, baking powder and salt until combined. Set aside.

4. In a separate, smaller bowl combine lemon zest and sugar with a fork. Set aside.

5. In the bowl of a standing mixer, using the paddle attachment combine buttermilk, oil, lemon juice, eggs and vanilla. Mix on a low speed until the ingredients are combined.

6. Add the flour mixture and sugar mixture, and continue to mix until smooth and fully combined.

7. Transfer the batter into the greased loaf pan, and bake for 50-55 minutes, or until golden brown and a toothpick inserted comes out clean. (If the top is starting to brown too quickly, you can tent aluminum foil on it.)

8. Remove from oven, and allow to fully cool.

9. Combine powdered sugar, cream and lemon juice until glaze forms, then spoon and smooth over the loaf. 


Yummmmmmm...

Man, that hit the spot.

Store it in an airtight container for up to 3 days. The next day it is even BETTER!! Yummy!

What other copycat recipe would you like to see me try? Any special requests?